
Calibration Process - Camera Calibration
")


Introduction
This section covers the theory, foundations and practical tips for calibrating the camera for Video Stabilization. This process is critical for proper stabilization and enhancing the results' quality.
Calibrated cameras offer two advantages when working with video stabilization:
- The intrinsic camera matrix is used to convert between real-world coordinates and image space dimensions.
- The distortion parameters are used to remove distortion from images caused by camera lens.
The RidgeRun Video Stabilization Library provides various camera calibration tools (explained below) to obtain the intrinsic camera matrix and distortion parameters. In order to simplify the construction and usage of the camera calibration tool, we also provide a Docker container that runs the calibration tool on a set of samples and provides the resulting calibration data.
This section also covers the usage of the integrated calibration tool and its use along the different calibration stages.
Theory
The camera calibration process finds the intrinsic camera matrix that represents a mapping between the image space (in pixels) framework and the image's real-world metric system. In other words, it maps from pixels on the image to physical units in mm. This gives an idea of the camera surroundings and the overall imaging system.
On the other hand, the calibration process also finds the distortion parameters, which describe the distortion due to the curvature of the fisheye lens.
The following image illustrates the entire process, where the intrinsic camera matrix helps to go from the Image Coordinate System (at the bottom) to the World Coordinate System (at the mid-top). The distortion parameters help to transition from the Camera Coordinate System (semisphere) to the rectilinear system (plain image).

The working principle of the stabilization library is based on the rotation of the camera lens with respect to the origin of the image plane.
The RidgeRun Video Stabilization Library is flexible in terms of calibration, allowing a lax calibration that can work for any camera if and only if they use the same lens (model and manufacturer) and image sensor. This means that, for mass production, only one camera needs calibration, and it is possible to generalise without significant quality loss.
Calibration Pattern
Camera calibration requires a known pattern with known dimensions to properly translate the image coordinate system to the world coordinate system. Moreover, it must be as uniform as possible to highlight lines to determine the distortion coefficients.
Our suggestion is to print the chessboard pattern on a solid surface and rigid as follows:
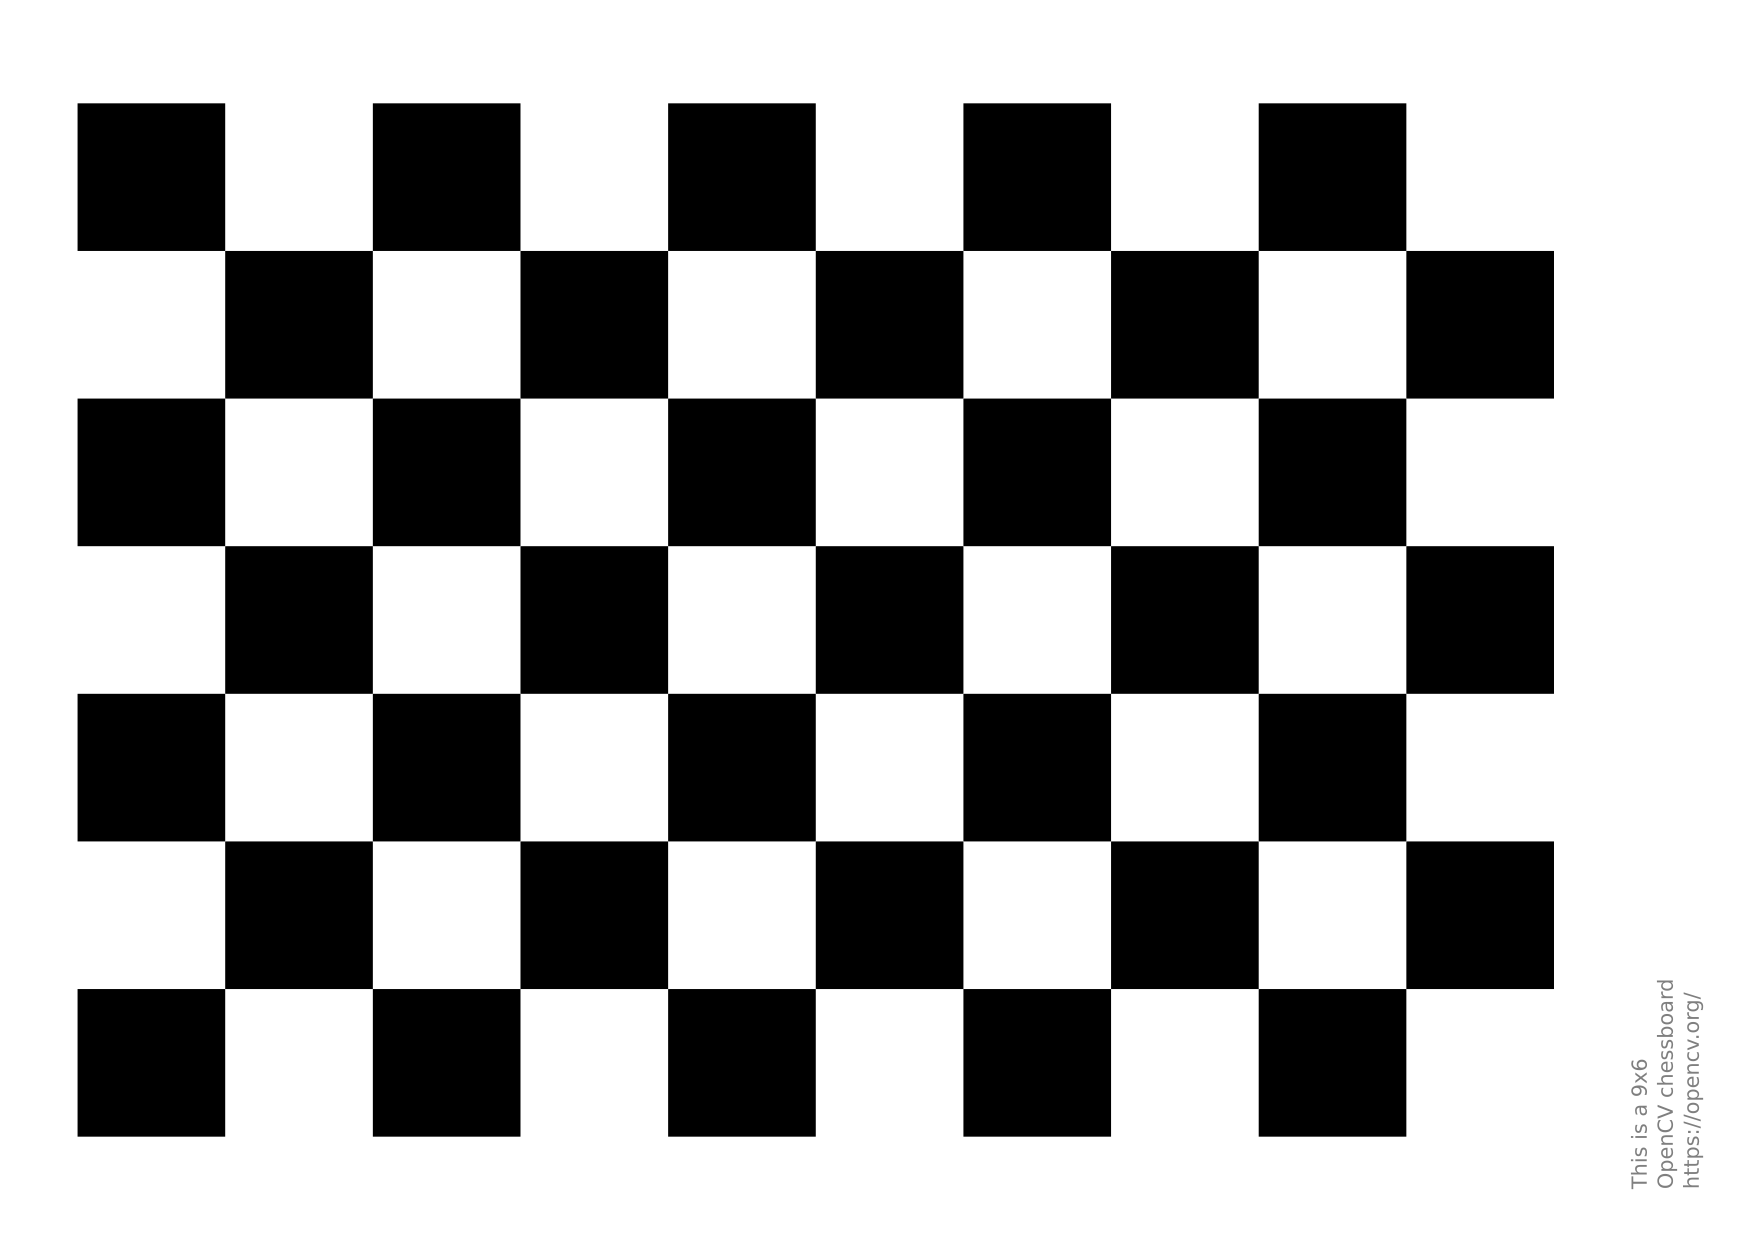
GitHub Link for chessboard pattern. It is a 9x6 pattern with 25mm squares that can be printed on a letter-size/A4 piece of paper.
Sampling
After printing the calibration pattern (chessboard), it is time to take some pictures. They must comply with the following criteria:
- No blur: the idea is to have a clear image without movement.
- Always in the scene: the chessboard must always be completely visible in the scene.
- Final image dimensions: use the image dimensions used in production during calibration. If the production environment uses 1080p images, the calibration should also use 1080p for better results.
- Good amount of images: take at least 50 samples for image calibration.
During the capture, the chessboard must be placed in different image regions using different positions, such as rotation in the three axes and translations.
Good Samples:

Bad Calibration Samples:

Remote Web Tool (recommended)
There is a web tool available to run the Camera calibration, this captures using the device while the processing is done in local computer. It provides with a UI in a browser to manage the calibration flow easily.
The following video exemplifies the usage of this web tool for camera Calibration.
Considerations
Make sure you have all requirements mentioned in the Calibration Process/Installing section.
Tool Description
The web tool consist of the following main parts:
- Target Device connection
- Define required parameters for calibration process
- Video capture and sample selection
- Sample selection
- Results display
- Resulting directory
Target Device connection
For this section you will need to enter the device’s IP. This step checks if the IP is valid.
Following, enter the device’s credentials. Which are the user and password to log in into the device.
Define required parameters for calibration process
For this section you will need to enter the calibration parameter. The required parameters are:
- Image resolution: the width and height values that match your camera’s supported resolution. For example, 1080 by 720.
- Video device: which is your camera input. If you’re using the default camera, you can enter /dev/video0.
- Capture duration in seconds: this parameter define how long the system will record images for calibration.
- Output folder: enter manually the desired path to save your data. Make sure this location is accessible and has enough storage.
- Calibration board settings: enter the number of inner corners along the X and Y axes of your checkerboard pattern. Also, provide the checker size, which is the size of each square in millimeters. If you are using the provided pattern in the documentation: here keep the values as default.
- Calibration model. These parameter depends on your camera, choose Brown-Conrady for standard lenses, or Fisheye if you are using a fisheye camera.
Video capture
The following images show the proper motion mentioned before:

You will use your checkerboard pattern to collect samples. The gif shown above explain how to hold the board in front of the camera and how to move it slowly to different positions and angles.
Make sure the pattern is fully visible in the frame, and try to cover as much of the image area as possible. Tilt and rotate the board slightly to capture a variety of perspectives.
Avoid sudden movements, and keep the board steady for a moment in each position so the system can detect it properly.
This step helps the system understand how the camera sees the pattern from different viewpoints, which is essential for accurate calibration.
Sample selection
After the capturing process, there is a review section to select the collected samples.
There are many captured images during the acquisition step. The system has pre-selected the samples, only where the pattern is located which considers it to be valid for calibration.
You can click on individual images to select or deselect them. To get better results keep images where the checkerboard is clearly visible, well-positioned, and covers different areas and angles of the frame following the guidelines in here
You need to select at least 30 valid samples to obtain better results.
Results display
When calibration is done, the results are displayed.
The displayed results are:
- RMS (Root Mean Square error): measures how well the calibration fits the observed data.
Lower values are better:
 0.1 - 0.5 : Excellent
 0.5 - 1.0 : Good
 > 1.0 : Could be improved
- Model: This refers the selected calibration model, for example Brown–Conrady distortion model, a standard camera lens distortion model.
- Camera Matrix: This matrix defines how 3D points are projected onto the 2D image. Which corresponds to this form:
- Undistortion Matrix: This is to correct lens distortion, therefore straight lines should be straight again when projected.
Resulting directory
The results are saved inside the output_folder selected in the Define parameters section. Inside the chosen directory you will find:
calibration_result.jsonandcalibration_result.txt: These files contain detailed calibration information, including, selected model, chosen samples, RMS error, calibration matrix, etc.calibration.yml: This file stores the calibration output in a format used as input for the IMU calibration.input_samples/raw/: Contains the original images without chessboard detection. These images are used as input for the calibration algorithminput_samples/validation:Contains the same images as in the previous directory , but with chessboard detection applied. These are used only for visualization during sample selection.recieved_video.mp4: The original video captured from the target device. This video is used to extract all calibration samples stored ininput_samples/raw/.
The output directory should follow this structure:
├── calibration_result.json
├── calibration_result.txt
├── calibration.yml
├── input_samples
│   ├── raw
│   │   ├── sample_000.png
│   │   ├── sample_001.png
│   │   ├── sample_002.png
│   │   ├── sample_003.png
│   │   ├── sample_004.png
│   │   ├── sample_005.png
|        ...
│   │   └── sample_562.png
│   └── validation
│       ├── sample_000.png
│       ├── sample_001.png
│       ├── sample_002.png
│       ├── sample_003.png
│       ├── sample_004.png
│       ├── sample_005.png
|        ...
│       └── sample_562.png
└── received_video.mp4
Note: The process can also be done from the terminal, directly on the target device. See the section below Calibrating using the local tool for further details.
Additional considerations
Known issues:
- In case of images greater than 4K, the tool may hang. Nevertheless, re-running will recover from the last valid point.
- If a clean run is wanted after a calibration, please delete the /tmp/rvs-output/cam folder
Alternative 1: Calibration Container Image
Dependencies
- Compulsory dependencies: Make sure to have the compulsory dependencies for the RidgeRun Video Stabilization Library.
- Docker: Additionally, Docker is used to build and run the calibration container. To install Docker, follow these guides:
Build Steps
Once the code for the video stabilizer library has been obtained, follow these steps from the project root to build the docker image for the calibration container:
- Obtain the project submodules:
git submodule update --init --recursive
meson subprojects download
- Build the docker image:
export DOCKER_BUILDKIT=1
docker build -f ./docker/camera-calibrator-legacy/Dockerfile -t ridgerun/video-stabilization-library:cameracalibrator .
Using the Calibration Container
To use the calibration container, the host must first have a directory that is going to be mounted as a volume on the container and where the calibration results will be stored. In the following commands, replace </path/to/host-volume> with the absolute path to this directory.
This directory must contain a subdirectory named samples that contains all the calibration samples. These samples are expected to be jpg files.
Below we instructions for using the calibration container in 4 different configurations:
- Default Configuration
- Configuring Calibration Technique
- Interactive Sample Selection
- Previewing Samples
We also provide an example where we combine configurations:
Default Configuration
Run the calibration container with:
docker run --rm --name calibration-container --mount type=bind,src=</path/to/host-volume>,dst=/root/host-volume ridgerun/video-stabilization-library:cameracalibrator
This will save a calibration.yml file in the mounted volume with the calibration data. Additionally, a samples-undistorted subdirectory will be created in the mounted volume and it will contain all the undistorted samples.
Configuring Calibration Technique
To specify the calibration technique, run the calibration container with:
docker run --rm --name calibration-container --mount type=bind,src=</path/to/host-volume>,dst=/root/host-volume ridgerun/video-stabilization-library:cameracalibrator -t <technique>
Replace <technique> with the desired technique. The available techniques are:
fisheye: This is the default technique and it uses the fisheye lens model to calibrate the samples.brown: This uses the Brown-Comrady lens model to calibrate the samples.
Interactive Sample Selection
To interactively select samples, run the calibration container with:
docker run --rm --name calibration-container --mount type=bind,src=</path/to/host-volume>,dst=/root/host-volume -it ridgerun/video-stabilization-library:cameracalibrator
This allows the use of the following commands to select samples used for calibration:
ENTER: Selects the samplen + ENTER: Discards the sampleq + ENTER: Ends the sample selection and starts the calibration
Previewing Samples
To preview the samples during the sample selection step (assuming the host uses the X window system), run the calibration container with:
xhost +local:
docker run --rm --name calibration-container -e DISPLAY=$DISPLAY --mount type=bind,src=/tmp/.X11-unix,dst=/tmp/.X11-unix,readonly --mount type=bind,src=</path/to/host-volume>,dst=/root/host-volume ridgerun/video-stabilization-library:cameracalibrator -p
These commands allows the container access to the X server on the host so that it can open a preview window.
Combining Configurations
The previous configurations can be combined to customize the calibration experience. For example, the following commands use the Brown-Comrady lens model to calibrate, they allow the user to interactively select samples, and they display a preview of the samples during the selection step:
xhost +local:
docker run --rm --name calibration-container -e DISPLAY=$DISPLAY --mount type=bind,src=/tmp/.X11-unix,dst=/tmp/.X11-unix,readonly --mount type=bind,src=</path/to/host-volume>,dst=/root/host-volume -it ridgerun/video-stabilization-library:cameracalibrator -p -t brown
Alternative 2: Local (on target) Calibration
The library includes a tool to help during the camera calibration process. This tool is called rvs-camera-calibration and it is intended for evaluation purposes. It allows:
- Capturing: captures the frames for calibration. It must be run with the camera connected. It does not require the IMU to work.
- Calibrating: gets the captured frames and generates the matrices. It can be run on another platform or computer.
- Undistort: tests the matrices on the captured frames. It can be run on another platform or computer.
The options are:
---------------------------------------------------------
 RidgeRun Video Stabilisation Library
 Camera Calibration Tool
---------------------------------------------------------


Usage:
    rvs-camera-calibration -m MODE -c v4l2 -d CAMERA_NUMBER -o PATH -i PATH -s NUMBER_SAMPLES [-p] [-q]

Options:
    -h: prints this message
    -m: application mode:
        capture: capture the image samples for calibration.
                 Requires -o to be defined
        calibration: perform the calibration with the samples
                 Requires -i to be defined with images in the
                 format ###.jpg. Saves the files into the fil
                 e calibration.yml
        undistort: test the undistortion parameters.
                 Requires -i to be defined with images in the
                 format ###.jpg. Loads the files into the fil
                 e calibration.yml
                 Also requires -o to be defined to save the
                 undistorted images
    -d: camera number. It is the camera or sensor identifier
        For example: 0 for /dev/video0
    -c: capture source (already demosaiced). Selects the
        video source. For example: argus or v4l2. Default:
        argus
    -t: technique. Selects the algorithm for calibration and
        correction. Default: (fisheye). Other: brown
    -s: number of samples. Number of images to take during
        the capture mode. Default: 50
    -o: output path. Existing output folder to save the
        samples: For example: ./samples/
    -i: input path. Existing input folder to retrieve the
        samples: For example: ./samples/
    -k: detect chessboard. Perform detection of the pattern
        during capture
    -p: preview the images, approving by pressing Y and
        cancelling with N. It helps to discard bad samples.
        Default: disabled
Using the RidgeRun Video Stabilization Tool
The capture mode of the tool allows for capturing pictures from the camera and storing them in a sequence for later calibration. It uses OpenCV and GStreamer to capture and is compatible with V4L2 and NvArgus cameras.
The use of the capture mode is the following:
# Camera index: equivalent to device /dev/video0 in V4L2 or sensor-id=0 in NvArgus
CAMERA_INDEX=0
# Resolution: must match the final stabilization resolution
WIDTH=1280
HEIGHT=720
# Output folder: where the images are stored. Must exist before running the tool
OUTPUT=./samples
# Capture device: Options are v4l2 or argus
DEV=v4l2

# Tool
rvs-camera-calibration -m capture -o ./samples -d $CAMERA_INDEX -width $WIDTH -height $HEIGHT -c $DEV -k
The options for the capture are:
Options:
    -d: camera number. It is the camera or sensor identifier
        For example: 0 for /dev/video0
    -c: capture source (already demosaiced). Selects the
        video source. For example: argus or v4l2. Default:
        argus
    -s: number of samples. Number of images to take during
        the capture mode. Default: 50
    -o: output path. Existing output folder to save the
        samples: For example: ./samples/
    -k: detect chessboard. Perform detection of the pattern
        during capture. Helps with verification.
    -p: preview the images, approving by pressing Y and
        cancelling with N. It helps to discard bad samples.
        Default: disabled.
While the tool is running, it will prompt in the command line whether to capture or not based on the preview. So the user can select pictures of better quality and discard bad samples. An example of the instructions is the following:
[INFO]: Capturing new frames. Please, take into account
        Press Enter to capture.
         Type 'n' and press Enter to discard and capture a new one.
         Type 'q' and press Enter to exit.

[INFO]: Recommendation: perform captures every two seconds or more
[INFO]: New frame captured: 0
n  <---------- an 'n' was typed to discard the frame 0
[INFO]: New frame captured: 1
   <---------- an 'Enter' was typed to save the frame 1
[INFO]: Saving into: ./samples/1.jpg
[INFO]: New frame captured: 2
   <---------- an 'Enter' was typed to save the frame 2
[INFO]: Saving into: ./samples/2.jpg
[INFO]: New frame captured: 3
q  <---------- a 'q' was typed to exit
[WARN]: Exiting early...
[INFO]: Terminating...
Calibration Computation
In the calibration stage, the calibration algorithm will identify the chessboard joining points. In this case, the algorithm first passes over all the images, where it is possible to check that the images are proper for calibration. An image is adequate if all the joint points are well-identified and well-connected. The columns of the chessboard must be connected through vertical lines, as illustrated by the following picture:

After verifying and classifying all images, the algorithm will take only the images classified as adequate and proceed to the computation of the camera matrix and the distortion parameters. The camera matrix is a 3x3 matrix, and the distortion parameters are a 1x4 matrix.
Using the RidgeRun Video Stabilization Tool
The calibration mode of the tool allows for calibrating the camera from already taken pictures from the camera. During the process, the user can select the samples with the chessboard clearly detected and discard the dubious ones. It uses the OpenCV library to calibrate the Fisheye and Brown-Comrady lens models.
The use of the calibration mode is the following:
# Input folder: where the images were stored from the previous step. Must exist before running the tool
INPUT=./samples
# Model: distortion model. Options: brown, fisheye
MODEL=fisheye

# Tool
rvs-camera-calibration -m calibration -i $INPUT -t $MODEL
The options for calibration are:
Options:
    -t: technique. Selects the algorithm for calibration and
        correction. Default: (fisheye). Other: brown
    -i: input path. Existing input folder to retrieve the
        samples: For example: ./samples/
    -k: detect chessboard. Perform detection of the pattern
        during capture
    -p: preview the images, approving by pressing Y and
        cancelling with N. It helps to discard bad samples.
        Default: disabled.
While the tool is running, it will prompt in the command line whether to capture or not based on the preview. So the user can select pictures of better quality and discard bad samples. An example of the instructions is the following:
---------------------------------------------------------
 RidgeRun Video Stabilisation Library
 Camera Calibration Tool
---------------------------------------------------------

[INFO]: Launching calibration tool

[INFO]: Selecting frames and calibrating. Please, take into account
        Press Enter to accept the frame and continue.
         Type 'n' and press Enter to discard.
         Type 'q' and press Enter to exit.

[INFO]: Calibrating with: brown-comrady

[INFO]: Reading file: ./samples/1.jpg
[WARN]: Cannot find the chessboard within the sample. Discarding... <--- When using -k
[WARN]: Chessboard not found. This image will be discarded

[INFO]: Reading file: ./samples/10.jpg
                                                                    <--- When accepting the frame
[INFO]: Image taken for calibration

[INFO]: Reading file: ./samples/11.jpg
q                                                                   <--- When exiting
[WARN]: Exiting early...
[INFO]: RMS: 0.355463

[INFO]: Camera matrix:

        {811.16, 0, 240.5040, 809.157, 216.635001}

[INFO]: Distortion:

        {-0.236816, 8.93896, -0.00620267, -0.0323884}

[INFO]: Terminating...
At the end of the calibration, it will print the matrices in a C-friendly format. Moreover, it will generate a calibration.yml file compatible with cv::FileStorage. These matrices should be used for GStreamer or a custom application to get better-quality results. In the case of GStreamer, set the properties:
- undistort-intrinsic-matrix:
undistort-intrinsic-matrix="<811.16, 0, 240.5040, 809.157, 216.635001>" - undistort-distortion-coefficients:
undistort-distortion-coefficients="<0, 0, 0, 0>"
Testing the Matrices
In the final stage of the calibration, the matrices are tested on the samples to identify possible issues during the calibration process. Some details to pay attention to are:
- The lines of the chessboard and other objects must be straight.
- The borders must change at least slightly.
In fisheye lenses, the roundness near the centre must disappear, highlighting lines and changing the borders.

In the image presented above, there are some important details to take into account:
- The A) and B) are undistorted images using the computed values.
- The C) is the original image captured by fisheye lenses.
Please notice that the A) has an issue in one of the chessboard squares. This is a sign of a bad calibration. The B) illustrates a case where the calibration is successful, highlighted by the straight lines of the chessboard.
Using the RidgeRun Video Stabilization Tool
The undistort mode of the tool allows for testing pictures already taken from the camera and storing the undistorted ones in a sequence. It can undistort using Fisheye and Brown-Comrady lens models.
The use of the undistort mode is the following:
# Input folder: where the distorted images are stored. Must exist before running the tool
INPUT=./samples
# Output folder: where the images are stored. Must exist before running the tool
OUTPUT=./samples-undistorted
# Model
MODEL=fisheye

# Tool
rvs-camera-calibration -m undistort -i $INPUT -o $OUTPUT -t $MODEL -p
The options are:
Options:
    -t: technique. Selects the algorithm for calibration and
        correction. Default: (fisheye). Other: brown
    -o: output path. Existing output folder to save the
        samples: For example: ./samples/
    -i: input path. Existing input folder to retrieve the
        samples: For example: ./samples/
    -p: preview the images, approving by pressing Y and
        cancelling with N. It helps to discard bad samples.
        Default: disabled.
An example of usage:
---------------------------------------------------------
 RidgeRun Video Stabilisation Library
 Camera Calibration Tool
---------------------------------------------------------

[INFO]: Launching undistortion tool

[INFO]: Undistorting with: brown-comrady
[INFO]: Loaded camera matrix:
[811.1599197236691, 0, 240.5041687070753;
 0, 809.1568154990285, 216.6352609536164;
 0, 0, 1]
[INFO]: Loaded distortion coefficients:
[-0.2368160042337804, 8.938961895909738, -0.00620267258069656, -0.03238835791507231, -88.68282698126136]
[INFO]: Reading file: ./samples/1.jpg
[INFO]: Saving undistorted file: ./samples-undistorted/1.jpg
[INFO]: Reading file: ./samples/10.jpg
[INFO]: Saving undistorted file: ./samples-undistorted/2.jpg
[INFO]: Reading file: ./samples/11.jpg
The matrices are loaded from the calibration.yml, and the frames can be passed by pressing enter.