Thundercomm TurboX C8550 - Camera Setup
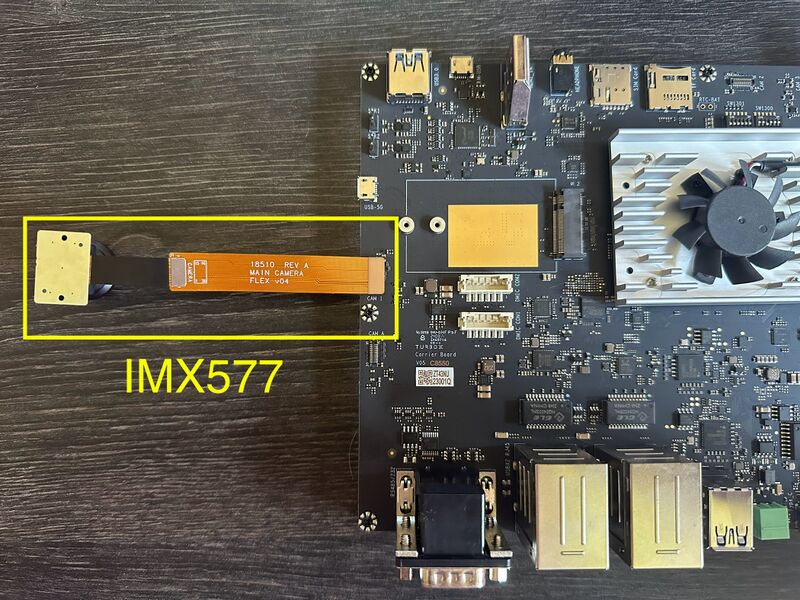
This section will help you to connect the IMX577 camera in the board[1].
Connect the Camera
1. Make sure the board is powered off.
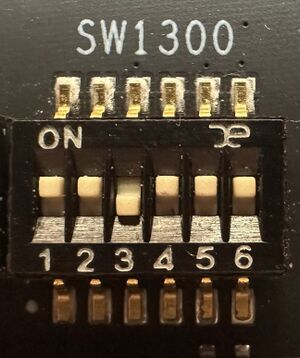
2. Set the DIP switch 4 from SW1300 to the ON position to switch the CSI3 to CAM1, as seen in Figure 3.

3. Plug the IMX577 camera into the CAM 1 port, as shown in Figure 4.

4. Power on the board.
5. Test the camera capture using any of the below options:
Test the Capture Using QIM SDK
Please refer to the GStreamer Pipelines section.
Test the Capture Using CamX HAL3 Application
1. Log in to the board:
adb root
adb shell
2. Run the CamX HAL3 CLI Application:
camx-hal3-test
3. Type on the app prompt the following command to configure a resolution of 4000x3000 in YUV420 raw format, with a JPEG compression format:
A:id=2,psize=4000x3000,pformat=yuv420,ssize=4000x3000,sformat=jpeg,zsl=1
If not, try restarting the application and start again from step 2. Sometimes the camera driver doesn't work well the first times.
4. Type on the app prompt the command to capture a snapshot:
S:1
5. Close the app by typing Q, or just pressing Ctrl + C.
6. You should see the captured image at /data/misc/camera/snapshot_w[4000]_h[3000]_id[XXXX]_stride[18167944]_slice[3008]_XXXXXXXX_XXXXXX.jpg.
7. Pull the image to your computer by running:
adb pull /data/misc/camera/snapshot_w[4000]_h[3000]_id[XXXX]_stride[18167944]_slice[3008]_XXXXXXXX_XXXXXX.jpg
USB Cameras
It is possible to connect a USB camera to the C8550 devkit; however, support for it in the kernel is not possible out of the box. One workaround solution for this is to connect your webcam using a USB-C adapter to the board.
References

