Yocto Support for NVIDIA® Jetson™ with JetPack 6 Integration - DeepStream
| Yocto Support for NVIDIA®Jetson™ with JetPack 6 Integration |
|---|

|
| Setting up Yocto |
| Flashing Jetson Platform |
| Accessing the Board |
| Adding NVIDIA Packages |
| DeepStream |
| Additional Topics |
| FAQ |
| Contact Us |
Complete the steps in Adding NVIDIA Packages page, before continuing with this section. |
NVIDIA Docker Container
NVIDIA Docker Setup
Use the same Yocto branch defined at Setting_up_Yocto section |
In addition to the basic Yocto and the meta-tegra layers, you will need the meta-virtualization layer and the meta-oe, meta-networking, meta-filesystems, and meta-python layers from the meta-openembedded repository.
1. Download repositories to the Yocto working directory
cd $YOCTO_DIR
git clone https://git.yoctoproject.org/git/meta-virtualization
cd meta-virtualization
git checkout $BRANCH
cd $YOCTO_DIR
git clone https://git.openembedded.org/meta-openembedded
cd meta-openembedded
git checkout $BRANCH
2. Add layers to conf/bblayers.conf
- Run below commands at the terminal
cd $YOCTO_DIR/build
bitbake-layers add-layer ../meta-openembedded/meta-oe/
bitbake-layers add-layer ../meta-openembedded/meta-python/
bitbake-layers add-layer ../meta-openembedded/meta-networking/
bitbake-layers add-layer ../meta-openembedded/meta-filesystems/
bitbake-layers add-layer ../meta-virtualization/
3. Add Docker packages and virtualization compatibility
In your build/local.conf file add the following lines:
#Base packages
IMAGE_INSTALL:append = " cuda-samples tensorrt-samples cudnn-samples gstreamer1.0-plugins-tegra"

#Support packages for docker support
IMAGE_INSTALL:append = " nvidia-docker libnvidia-container"

DISTRO_FEATURES:append = " ldconfig virtualization seccomp"
Note: The package-csv like recipes are needed by the nvidia-container-runtime to setup correctly the libraries when creating the docker environment. |
DeepStream Setup
NVIDIA has several containers available at the NGC Platform. DeepStream support is available through containers using nvidia-docker on Jetson systems. More information about the DeepStream image for L4T and Jetson Devices can be found in DeepStream 6.0.
The deepstream image requires:
- Jetson device running L4T r36.3.0
- At least JetPack 6.0 (scarthgap branch on
 meta-tegra )
Before you continue, you need to follow the NVIDIA Docker Setup section of this wiki if you haven't already.
1. Login into Jetson board and download the docker image
docker pull nvcr.io/nvidia/deepstream-l4t:7.0-samples-multiarch
Note: If you are having problems pulling the container, set the date and time correctly using the sudo date. command in the terminal. e.g. date -s "9 JUN 2024 11:34:00" |
2. Allow external applications to connect to the host's X display
xhost +
3. Run the docker container using the nvidia-docker (use the desired container tag in the command line below):
docker run -it --rm --net=host --runtime nvidia -w /opt/nvidia/deepstream/deepstream-7.0 nvcr.io/nvidia/deepstream-l4t:7.0-samples-multiarch
Or if you get an error about the display support:
docker run -it --rm --net=host --runtime nvidia -e DISPLAY=$DISPLAY -w /opt/nvidia/deepstream/deepstream-7.0 -v /tmp/.X11-unix/:/tmp/.X11-unix nvcr.io/nvidia/deepstream-l4t:7.0-samples-multiarch
Connect a monitor to the board, even if you are not using the graphic interface. A physical display is needed to show the contents of the DeepStream apps. |
Yocto Recipes
These recipes are NOT included in the main meta-tegra repository yet. |
The Yocto recipes related to Deepstream are in the meta-tegra-community repository.
1. Download the repository to the Yocto working directory
cd $YOCTO_DIR
git clone https://github.com/OE4T/meta-tegra-community.git
cd meta-tegra-community
git checkout scarthgap
2. Add layer to conf/bblayers.conf
cd $YOCTO_DIR/build
bitbake-layers add-layer ../meta-tegra-community/
Recipes Description
meta-tegra includes three recipes for deepstream support: deepstream-7.0, deepstream-pyds and deepstream-7.0-tests.
- deepstream-7.0: installs the DeepStream SDK prebuilt libraries and GStreamer plugins
- deepstream-7.0-pyds: installs the python bindings
- deepstream-7.0-tests: installs the C/C++ and Python sample applications for Deepstream SDK
Deepstream Setup
In order to include deepstream on your build you need to follow the next steps:
1. Add the packages that you require on your image in conf/local.conf
#Base package
IMAGE_INSTALL:append = " deepstream-7.0"

#Optional python binding and samples
IMAGE_INSTALL:append = " deepstream-7.0-pyds"

#Optional sample packages
IMAGE_INSTALL:append = " deepstream-tests"
DeepStream C/C++ examples
Connect a monitor to the board, even if you are not using the graphic interface. A physical display is needed to show the contents of the DeepStream apps. |
If you are running the sample for ssh, you first need to run "export DISPLAY=:0.0"
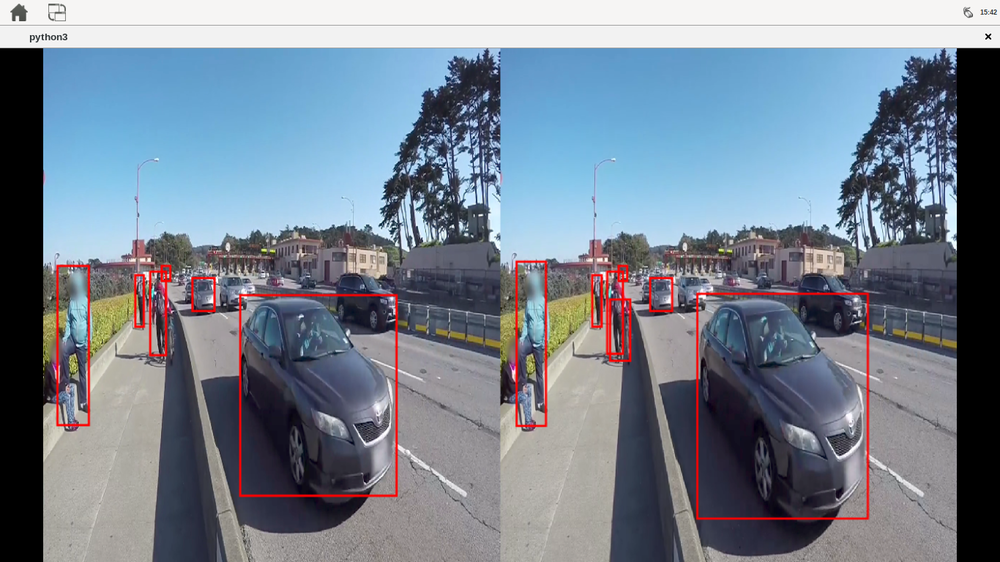
- deepstream-app the reference application of Deepstream. Uses GStreamer to accept input from multiple sources. It can use a configuration file to enable/disable components and change their properties.
You can run it with the following commands:
deepstream-app -c /opt/nvidia/deepstream/deepstream-7.0/samples/configs/deepstream-app/<CONFIG_FILE>
where <CONFIG_FILE> has to be replaced by one of the configuration files of the list below:
- source1_csi_dec_infer_resnet_int8.txt
- source1_usb_dec_infer_resnet_int8.txt
- source2_1080p_dec_infer-resnet_demux_int8.txt
- source2_csi_usb_dec_infer_resnet_int8.txt
- source2_dewarper_test.txt
- source30_1080p_dec_infer-resnet_tiled_display_int8.txt
- source30_1080p_dec_infer-resnet_tiled_display_int8.yml
- source30_1080p_dec_preprocess_infer-resnet_tiled_display_int8.txt
- source4_1080p_dec_infer-resnet_tracker_sgie_tiled_display_int8.txt
- source4_1080p_dec_infer-resnet_tracker_sgie_tiled_display_int8.yml
- source4_1080p_dec_preprocess_infer-resnet_preprocess_sgie_tiled_display_int8.txt
- source6_csi_dec_infer_resnet_int8.txt
You will see objects being detected in multiple sources, depending on the configuration file. You can select one source by pressing z on the console where the app is running, followed by the row index [0-9] and the column index [0-9] of the source. To restore the original view, press z again.
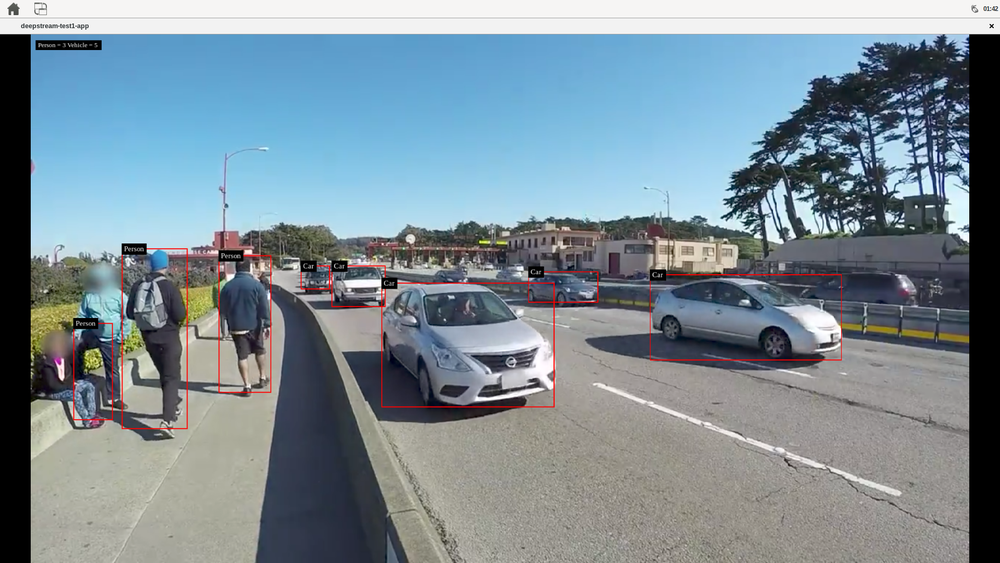
- deepstream-test1: a simple example that uses DeepStream element to detect cars, persons, and bikes on a given single H.264 stream. The example uses the following pipeline: filesrc → decode→ nvstreammux → nvinfer (primary detector) → nvdsosd→ renderer.
You can run it with the following commands:
# move to the deepstream-test1 source directory, the test needs the configuration file
# in there and uses fixed relative locations
cd /opt/nvidia/deepstream/deepstream-7.0/sources/apps/sample_apps/deepstream-test1

# run the deepstream detection over the sample_720p.h264 file, but you can use any
# H.264 stream
deepstream-test1-app /opt/nvidia/deepstream/deepstream-7.0/samples/streams/sample_720p.h264
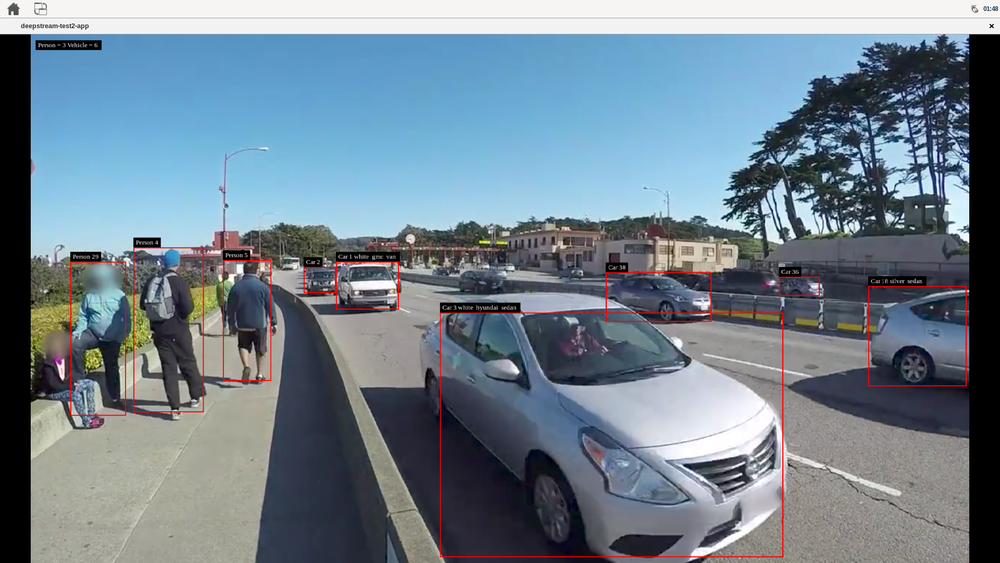
- deepstream-test2: a simple example that uses DeepStream elements on a given single H.264 stream to detect cars, persons, and bikes, tracks the car with a number, and classifies the cars by brand and color. The example uses the following pipeline: filesrc→ decode→ nvstreammux→ nvinfer (primary detector)→ nvtracker→ nvinfer (secondary classifier)→ nvdsosd → renderer.
You can run it with the following commands:
# move to the deepstream-test2 source directory, the test needs the configuration file
# in there and uses fixed relative locations
cd /opt/nvidia/deepstream/deepstream-7.0/sources/apps/sample_apps/deepstream-test2

# run the deepstream detection over the sample_720p.h264 file, but you can use any
# H.264 stream
deepstream-test2-app /opt/nvidia/deepstream/deepstream-7.0/samples/streams/sample_720p.h264
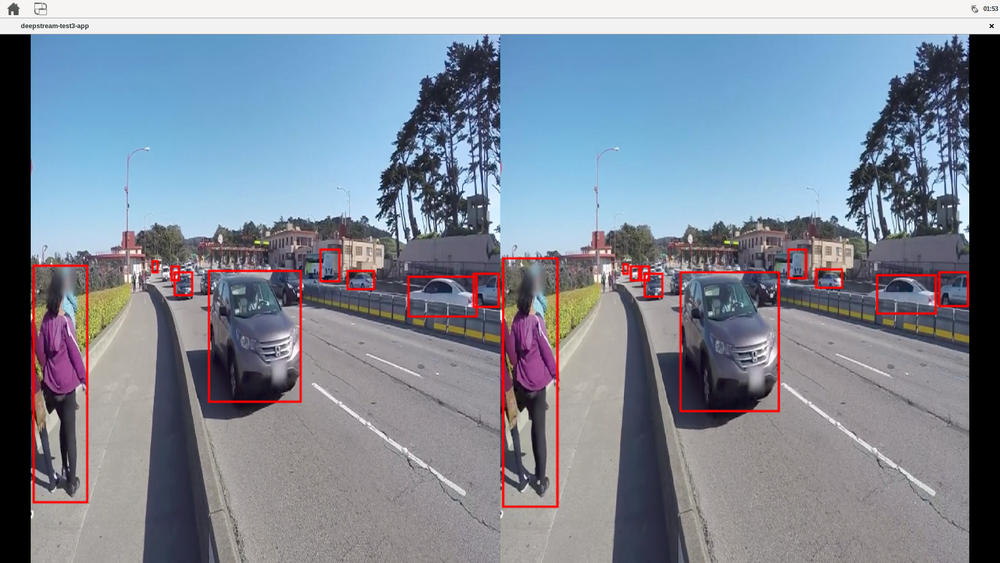
- deepstream-test3: this example accepts one or more H.264/H.265 video streams as input. It creates a source bin for each input and connects the bins to an instance of the "nvstreammux" element, which forms the batch of frames. The batch of frames is fed to "nvinfer" for batched inferencing. The batched buffer is composited into a 2D tile array using "nvmultistreamtiler." The rest of the pipeline is similar to the deepstream-test1 sample. The inputs can be files or RTSP streams, shows side by side the videos detecting vehicles and persons
You can run it with the following commands:
# move to the deepstream-test3 source directory, the test needs the configuration file
# in there and uses fixed relative locations
cd /opt/nvidia/deepstream/deepstream-7.0/sources/apps/sample_apps/deepstream-test3

# run the deepstream example with 2 mp4 files
deepstream-test3-app file:///opt/nvidia/deepstream/deepstream-7.0/samples/streams/sample_1080p_h264.mp4 file:///opt/nvidia/deepstream/deepstream-7.0/samples/streams/sample_720p.mp4


# or run the example with one mp4 file and one rtsp stream
deepstream-test3-app file:///opt/nvidia/deepstream/deepstream-7.0/samples/streams/sample_1080p_h264.mp4 rtsp://192.168.1.4:7000/stream
DeepStream Python examples
Connect a monitor to the board, even if you are not using the graphic interface. A physical display is needed to show the contents of the DeepStream apps. |
If you are running the sample for ssh, you first need to run "export DISPLAY=:0.0"
- deepstream_test_1: a simple example that uses DeepStream element to detect cars, persons, and bikes on a given single H.264 stream. The example uses the following pipeline: filesrc → decode→ nvstreammux → nvinfer (primary detector) → nvdsosd→ renderer.
You can run it with the following commands:
# move to the deepstream-test1 source directory, the test needs the configuration file
# in there and uses fixed relative locations
cd /opt/nvidia/deepstream/deepstream-7.0/sources/deepstream_python_apps/apps/deepstream-test1

# run the deepstream detection over the sample_720p.h264 file, but you can use any
# H.264 stream
python3 deepstream_test_1.py /opt/nvidia/deepstream/deepstream-7.0/samples/streams/sample_720p.h264
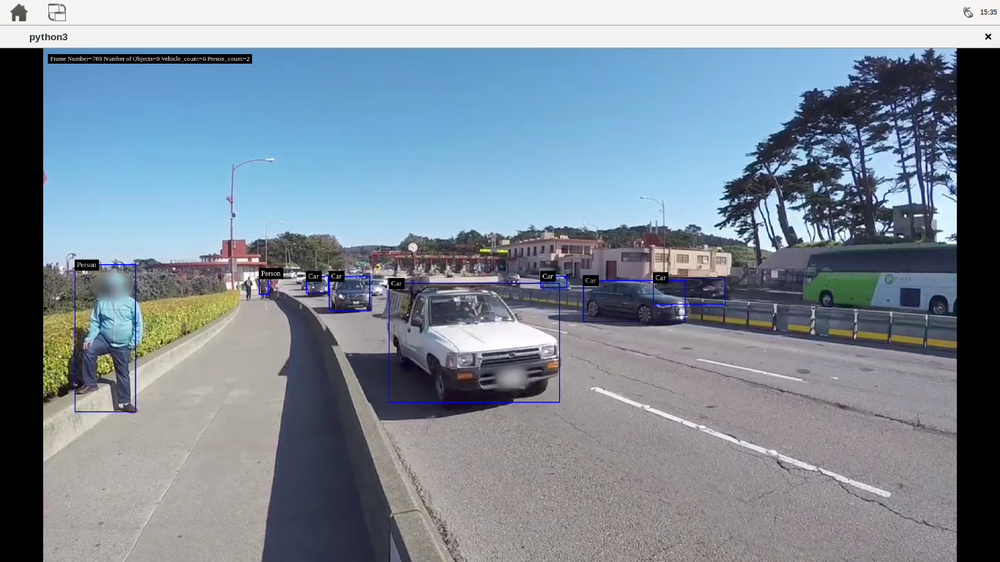
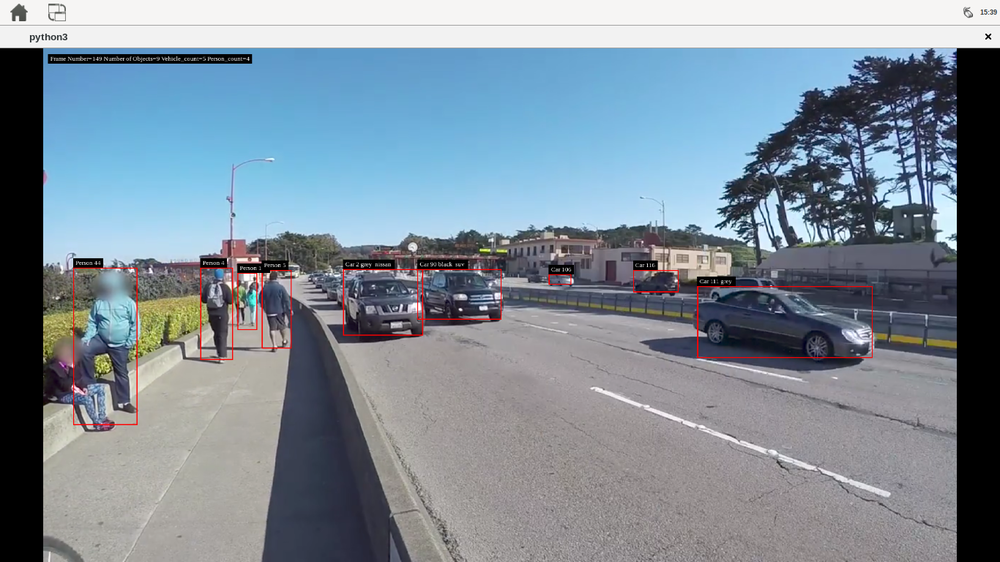
- deepstream_test_2: a simple example that uses DeepStream elements on a given single H.264 stream to detect cars, persons and bikes, tracks the car with a number and classifies the cars by brand and color. The example uses the following pipeline: filesrc→ decode→ nvstreammux→ nvinfer (primary detector)→ nvtracker→ nvinfer (secondary classifier)→ nvdsosd → renderer.
You can run it with the following commands:
# move to the deepstream-test2 source directory, the test needs the configuration file
# in there and uses fixed relative locations
cd /opt/nvidia/deepstream/deepstream-7.0/sources/deepstream_python_apps/apps/deepstream-test2

# run the deepstream detection over the sample_720p.h264 file, but you can use any
# H.264 stream
python3 deepstream_test_2.py /opt/nvidia/deepstream/deepstream-7.0/samples/streams/sample_720p.h264
- deepstream_test_3: This sample accepts one or more H.264/H.265 video streams as input. It creates a source bin for each input and connects the bins to an instance of the "nvstreammux" element, which forms the batch of frames. The batch of frames is fed to "nvinfer" for batched inferencing. The batched buffer is composited into a 2D tile array using "nvmultistreamtiler." The rest of the pipeline is similar to the deepstream-test1 sample. The inputs can be files or RTSP streams, shows side by side the videos detecting vehicles and persons.
You can run it with the following commands:
# move to the deepstream-test3 source directory, the test needs the configuration file
# in there and uses fixed relative locations
cd /opt/nvidia/deepstream/deepstream-7.0/sources/deepstream_python_apps/apps/deepstream-test3

# run the deepstream example with 2 mp4 files
python3 deepstream_test_3.py -i file:///opt/nvidia/deepstream/deepstream-7.0/samples/streams/sample_1080p_h264.mp4 file:///opt/nvidia/deepstream/deepstream-7.0/samples/streams/sample_720p.mp4

# or run the example with one mp4 file and one RTSP stream
python3 deepstream_test_3.py file:///opt/nvidia/deepstream/deepstream-7.0/samples/streams/sample_1080p_h264.mp4 rtsp://192.168.1.4:7000/stream
