About 360 Video
| RidgeRun Image Projector |
|---|

|
| Image Projector Basics |
| Overview |
| Getting Started |
| User Guide |
| Examples |
| Performance |
|
Xavier
|
| Contact Us |
The RidgeRun’s 360 stitcher is capable of creating a 360 frame from a group of fisheye or rectilinear cameras. For a full view of the surrounding scene, the camera’s FOV must cover the 360 region around the cameras, the minimum should be 2 fisheye cameras back to back with 180 degrees of FOV.
The resultant 360 frame is nothing else than an equirectangular projection of the world around the cameras, a planar representation of the spherical world coordinates. The most common equirectangular projection in our lives is the world map, where the projection maps the constant spacing meridians to vertical straight lines of constant spacing and the constant spacing circles of latitude to horizontal straight lines of constant spacing.
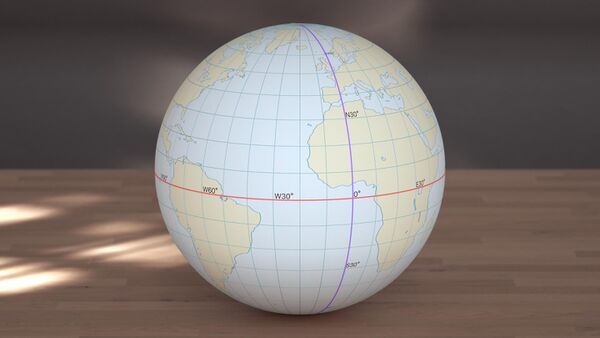
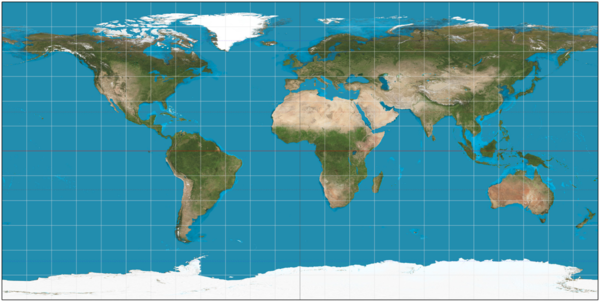
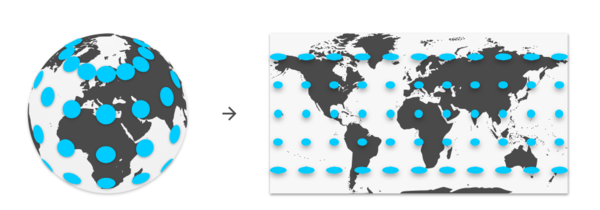
As you can infer from the world map above, the 360 image consists of 360 degrees of longitude in the horizontal direction and 180 degrees in the vertical. So the 360 stitcher provides an equirectangular image with an aspect ratio of 2:1. As shown in the following image:
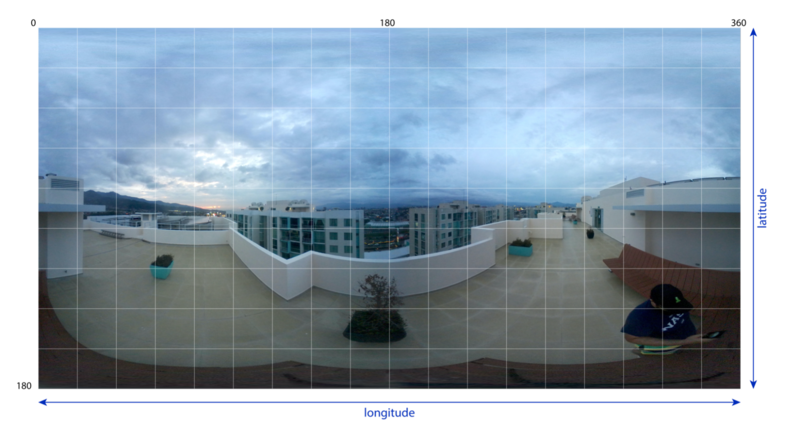
In the 360 image/equirectangular panoramic image all the verticals remain vertical and the horizon becomes a straight line across the middle of the image. Also the coordinates in the image relate linearly to pan and tilt angles in the real world. Making the poles to be located at the top and bottom sides of the image, stretched to the entire image width, and the areas near the poles get stretched horizontally.
In the case of the cameras, each camera's equirectangular projection would generate a portion of the 360 image projection depending on the lenses’ specifications, the equirectangular projection section below will get into more details about it.
In general, the 360 stitcher full process follows the next steps: capture from an array of fisheye cameras that covers the 360 degrees longitude, projection of each fisheye image to an equirectangular image, and stitching of the equirectangular projections to create a blended 360 image.
Fisheye Lenses
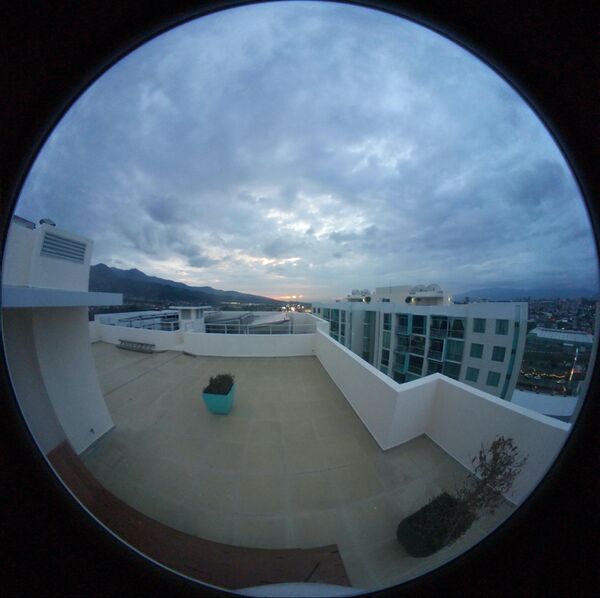
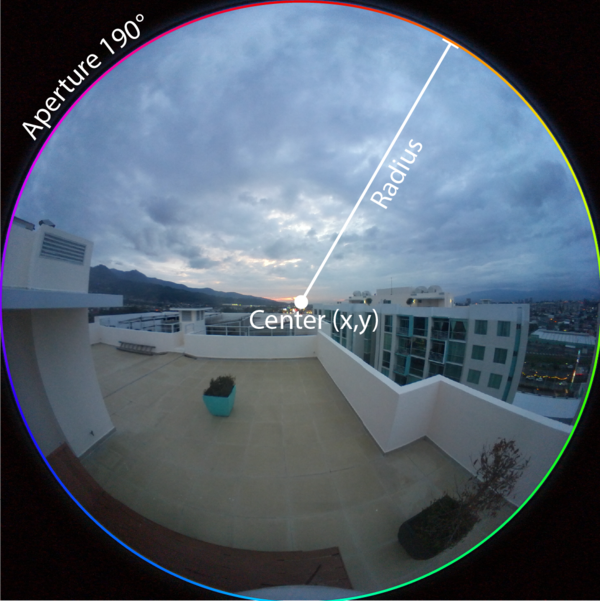
A fisheye lens is a wide-angle lens with a distortion that allows a small number of cameras to cover the 360 world around the cameras. The fisheye cameras produce images with a circular scenario and black borders as shown below.
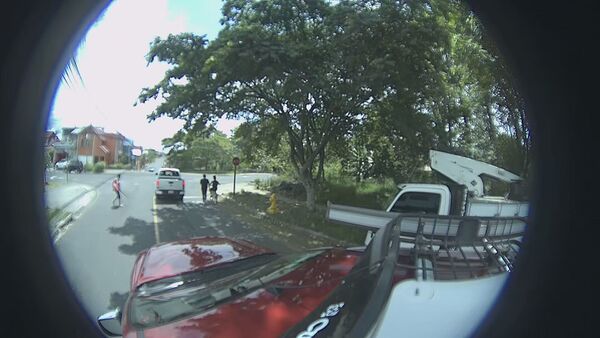
However, depending on the sensor that you are using and the capture configuration, you may receive fisheye images cropped as shown below, having just a partial section of the fisheye circle. The 360 stitcher will be able to handle those types of images as well, just need to set the appropriate parameters (described later) and remember that your final 360 frame will have missing information around the poles.
For the stitcher, the fisheyes images are going to be considered as circular fisheyes where the longitude is radially symmetrical and the latitude proportional to the radius from the center of the fisheye circle. Most lenses will have a distortion that differs from the previous ideal description but for now, that distortion will be ignored.
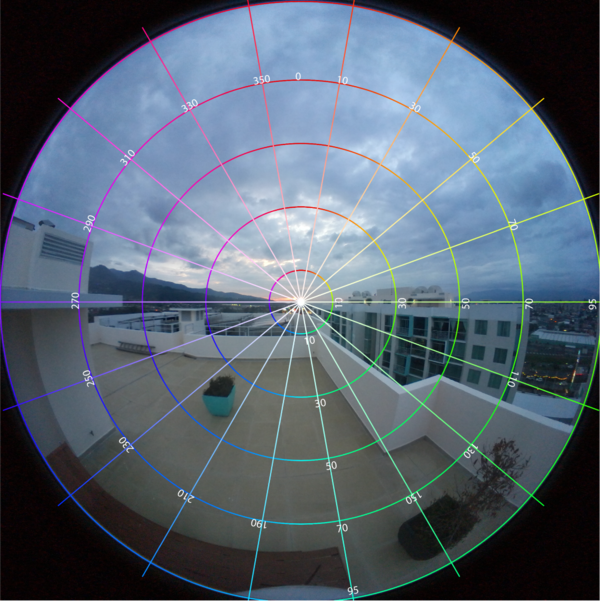
The most important features of the fisheye image for the stitcher are: aperture, radius, and center.
- Aperture: indicates the angle of view of the fisheye lens. Fisheye lenses can capture 180 degrees and up.
- Radius: is the radius of the fisheye circle that matches the aperture.
- Center: is the center of the fisheye circle
Fisheye to Equirectangular Projection
Even though the fisheye only covers a limited angle of view of the real world, the corresponding equirectangular projection image corresponds to 360 degrees but will have black areas.
The relationship between the fisheye image and the equirectangular projection can be determined geometrically, we are not going to get into details, but you can visualize it in the figures below. As you can see, the region projected in the equirectangular frame will change according to the aperture. For the equirectangular projection of a fisheye of 180 degrees or less half of the image is totally black and doesn’t provide any relevant information, so that memory could be discarded to save resources.
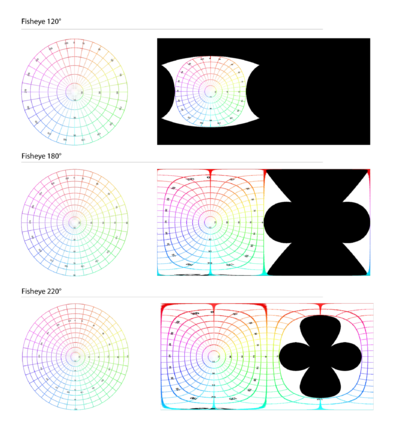
You need to know that a fisheye to equirectangular projector converts the fisheye image where the real-world verticals are curved to actual vertical lines in the equirectangular image and the horizon is converted to a horizontal line. If the resultant equirectangular projection doesn’t look like this you should adjust the projector configuration to accomplish these results.

In a real-world scenario, the fisheye lenses will not be located on the same optical axis and will not have the same characteristics. So to adjust the equirectangular projection to this imperfect setup, you need to define to the projector the fisheye lens characteristics: aperture, radio, and center. Also, you can configure the fisheye rotations to adjust the optical axis, it is assumed that the camera is looking over the Y axis, so the Y rotation works to roll the fisheye lens as if you grab the lens front and rotate your hand. The X-axis is at the side of the camera, so if you change the rotation over this axis you can correct the fisheye tilt angle. Finally, the Z axis is up over the camera and works to pan the fisheye camera over the horizon.
Rectilinear Lenses
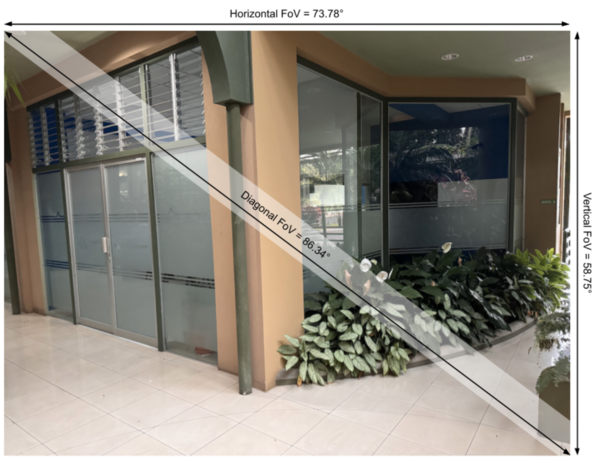
A rectilinear camera or lens, is a camera that captures the world as our eyes do. This means that straight lines in the real world will remain straight in the captured image. This comes with the disadvantage that the field-of-view (FoV) that a rectilinear camera can capture is limited to a maximum of approximately 120°, being 90° or 100° the most common. This, in turn, means that you will need more rectilinear images to capture a 360° panoramic view of the scene (unlike fisheye, where 2 ~180° images may suffice). A rectilinear lens if typically characterized by its FoV (or, more correctly, angle of view), which can diagonal, horizontal or vertical.
